How To Make Hickeys On Yourself: The Ultimate Guide
Let’s face it—hickeys are one of those things that can spark curiosity, whether it’s for fun, experimentation, or just plain curiosity about human anatomy. If you’ve ever wondered how to make hickeys on yourself without needing someone else’s help, you’re not alone. In this guide, we’ll break down everything you need to know about creating your own hickeys safely and effectively.
Now, before we dive into the nitty-gritty, let’s get one thing straight—hickeys are basically love bites. They’re created when the skin is sucked hard enough to rupture tiny blood vessels beneath the surface, leaving behind a reddish-purple mark. But what if you want to DIY it? That’s where this guide comes in. We’ll show you step-by-step methods, safety tips, and everything in between.
But hold up—this isn’t just a how-to article. We’re going deep into the science behind hickeys, debunking myths, and even sharing some fun facts. So, whether you’re doing it for a dare, art, or just because you can, keep reading. Let’s make this a memorable experience!
Read also:Tanaya Beatty Feet The Ultimate Guide To Her Journey And Fascinating Facts
Table of Contents
- What Are Hickeys?
- Is It Safe to Make Hickeys?
- Tools You Need
- Step-by-Step Guide to Making Hickeys
- Best Places to Put Hickeys
- How Long Do Hickeys Last?
- Removing Hickeys
- Common Mistakes to Avoid
- Tips for Covering Up Hickeys
- Final Thoughts
What Are Hickeys?
Alright, let’s start with the basics. Hickeys, or “love bites” as they’re sometimes called, are essentially bruises caused by suction on the skin. When you apply enough pressure, tiny blood vessels under the skin burst, creating that signature reddish-purple mark. They’re most commonly associated with romantic or playful moments, but hey, who says you can’t do it yourself?
Hickeys are more than just a mark—they’re a testament to human creativity and expression. Whether you’re into body art or just experimenting, understanding how they work is key to making them look good and last long.
Why Do People Get Hickeys?
There’s no single reason why people get hickeys. For some, it’s a sign of affection or intimacy. For others, it’s all about self-expression. And let’s be real—sometimes it’s just a fun challenge. Whatever your reason may be, knowing how to make hickeys on yourself opens up a whole new world of possibilities.
Is It Safe to Make Hickeys?
Before we jump into the process, it’s important to talk about safety. While hickeys might seem harmless, there are a few things you should keep in mind to avoid any unwanted complications. First off, hickeys are technically bruises, so overdoing it can lead to discomfort or even pain. Plus, if you’re using tools, you’ll want to make sure they’re clean and safe to use.
Another thing to consider is where you place the hickey. Some areas of the body are more sensitive than others, and applying too much pressure in the wrong spot could lead to issues. Stick to areas with softer skin, like the neck or inner arm, and always listen to your body.
Potential Risks
Here’s a quick rundown of potential risks:
Read also:Kumud Roy Kapur The Iconic Figure In Bollywood Who Stole Hearts
- Pain or discomfort if you apply too much pressure.
- Infection if you use unclean tools.
- Long-lasting discoloration in rare cases.
But don’t worry—we’ll show you how to avoid these issues later on!
Tools You Need
When it comes to making hickeys on yourself, having the right tools can make all the difference. While you don’t need anything fancy, a few simple items can help you achieve the perfect mark every time.
What You’ll Need
Here’s a list of tools you might want to consider:
- A straw or small tube (for creating suction).
- A clean finger or thumb (for applying pressure).
- A mirror (so you can see what you’re doing).
- Lotion or oil (optional, for smoother skin).
Remember, cleanliness is key. Make sure your hands and any tools you use are clean to prevent infection.
Step-by-Step Guide to Making Hickeys
Now, let’s get down to business. Here’s a step-by-step guide to creating your very own hickey:
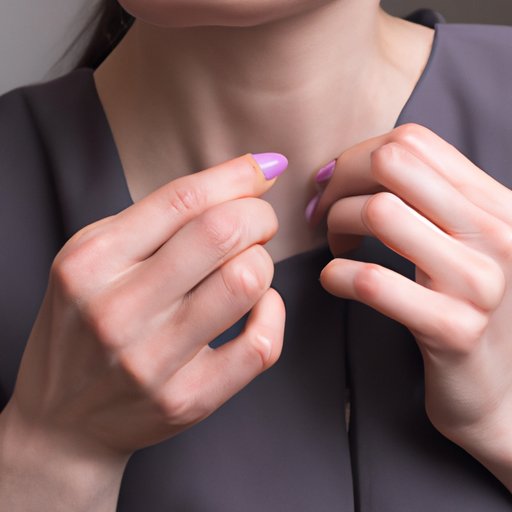
- Choose the right spot. Look for an area with soft, accessible skin, like your neck, inner arm, or shoulder.
- Prepare your tools. If you’re using a straw or tube, make sure it’s clean and free of debris.
- Create suction. Place the straw or tube over the chosen area and suck gently but firmly. You’ll feel the skin being pulled into the tube.
- Apply pressure. Use your finger or thumb to press down on the skin while maintaining suction. This helps rupture the tiny blood vessels beneath the surface.
- Hold steady. Keep the suction and pressure for about 10-20 seconds, depending on how dark you want the hickey to be.
- Release and repeat. Let go of the suction and check your work. If it’s not dark enough, repeat the process until you’re satisfied.
Pro tip: Don’t rush the process. Taking your time ensures a better result and reduces the risk of injury.
Best Places to Put Hickeys
Not all parts of your body are created equal when it comes to hickeys. Some areas are more prone to bruising than others, so it’s important to choose wisely. Here are some of the best places to put hickeys:
- Neck (classic and easy to hide with clothing).
- Inner arm (discreet and less sensitive).
- Shoulder (a great spot for a visible hickey).
- Upper chest (perfect for a subtle mark).
Remember, avoid areas with thin or sensitive skin, like your face or hands. Stick to spots where the skin is thicker and more forgiving.
Why the Neck is King
The neck is often considered the ultimate hickey spot for a reason. It’s easily accessible, has soft skin, and is a classic location for love bites. Plus, it’s easy to hide if you need to keep it on the down-low. Just make sure you’re not too rough—your neck is still a delicate area.
How Long Do Hickeys Last?
One of the most common questions about hickeys is how long they last. The answer depends on several factors, including your skin type, the amount of pressure applied, and how well you take care of the mark afterward.
On average, hickeys last anywhere from 3 to 10 days. Lighter marks tend to fade faster, while darker ones may take longer to disappear. If you want your hickey to last longer, avoid touching or scratching it, and keep the area clean.
Factors That Affect Healing Time
Here are a few things that can affect how long your hickey lasts:
- Your skin’s natural healing process.
- How much pressure you applied.
- Whether you take proper care of the mark.
And if you’re in a rush to get rid of it, we’ve got some tips for that later on!
Removing Hickeys
Let’s say you’ve had enough of your hickey and want it gone ASAP. There are a few methods you can try to speed up the healing process:
- Apply a cold compress to reduce swelling and discoloration.
- Use a warm compress to promote blood flow and healing.
- Massage the area gently to break up any remaining blood clots.
- Try over-the-counter creams or gels designed for bruises.
Keep in mind that these methods won’t make the hickey disappear instantly, but they can help it fade faster.
Common Mistakes to Avoid
Making hickeys on yourself might seem straightforward, but there are a few common mistakes that can ruin the experience. Here’s what to avoid:
- Using unclean tools, which can lead to infection.
- Applying too much pressure, causing pain or discomfort.
- Choosing the wrong spot, like areas with thin or sensitive skin.
- Not taking care of the mark after it’s made, leading to longer healing times.
By avoiding these mistakes, you’ll ensure a safer and more enjoyable experience.
Tips for Covering Up Hickeys
Let’s be honest—sometimes you need to hide your hickey, whether it’s for work, school, or personal reasons. Here are some tips for covering up hickeys effectively:
- Use concealer or foundation that matches your skin tone.
- Apply a green color corrector to neutralize redness before using foundation.
- Wear scarves, turtlenecks, or other clothing to physically cover the mark.
- Try temporary tattoo stickers for a creative and fun solution.
With a little creativity, you can keep your hickey under wraps until you’re ready to show it off.
Final Thoughts
And there you have it—your ultimate guide to making hickeys on yourself. Whether you’re doing it for fun, experimentation, or self-expression, remember to prioritize safety and take your time. With the right tools, techniques, and care, you can create the perfect hickey every time.
So, what are you waiting for? Grab your straw, find a mirror, and get to work. And don’t forget to share your experience in the comments below—we’d love to hear how it goes! Oh, and if you’re looking for more tips and tricks, be sure to check out our other articles. Happy hickey-making!
Article Recommendations