How To Use Remote Control Raspberry Pi Over Internet Without Extra Gadgets
Hey there, tech enthusiasts! Are you ready to dive into the world of remote controlling your Raspberry Pi over the internet? It’s a game-changer, trust me. Whether you're a seasoned pro or just starting out, this guide will walk you through how to use remote control Raspberry Pi over the internet without any extra gadgets. Let’s get our hands dirty, shall we?
Imagine this: you're miles away from your Raspberry Pi, but you need to access it for a project, troubleshooting, or just because you're a tech wizard who loves showing off. The good news is, you don’t need fancy hardware or expensive tools to make it happen. With just a few steps and the right software setup, you can take full control of your Pi from anywhere in the world.
This article isn’t just about theory; it’s about practical solutions that work. We’ll break down the process step-by-step, so even if you’re not a coding guru, you’ll still be able to follow along. So, buckle up and let’s explore how to turn your Raspberry Pi into a remote powerhouse without breaking the bank.
Read also:Great Country Farms Your Ultimate Guide To Agritourism Adventures
Why Remote Control Raspberry Pi Over the Internet?
Before we jump into the nitty-gritty, let’s talk about why you’d want to remotely control your Raspberry Pi over the internet. Sure, it sounds cool, but what’s the real benefit? Well, my friend, here’s the deal:
- Convenience: Access your Pi anytime, anywhere, without needing to be physically present.
- Efficiency: Save time and effort by managing your projects remotely instead of traveling back and forth.
- Flexibility: Use your Pi for server management, IoT projects, or even as a media center—all from the comfort of your couch or halfway across the globe.
- Cost-Effective: No need for expensive hardware or additional devices to make it happen.
Let’s face it, in today’s fast-paced world, having the ability to control your tech remotely is more than just a luxury—it’s a necessity. And with Raspberry Pi being one of the most versatile devices out there, why not take advantage of its full potential?
What You’ll Need to Get Started
Alright, let’s talk about the basics. To remotely control your Raspberry Pi over the internet, you’ll need a few essentials. Don’t worry, nothing fancy here:
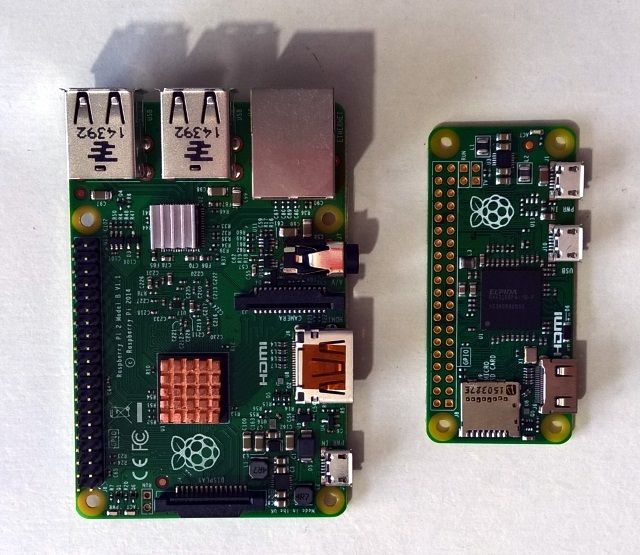
- Raspberry Pi: Any model will do, but make sure it’s properly set up and running the latest version of Raspberry Pi OS.
- Internet Connection: A stable and reliable connection is key. If your Pi can’t connect to the internet, well, you’re out of luck.
- SSH Access: This is crucial for remote communication with your Pi. We’ll cover how to enable it later.
- A Computer or Mobile Device: You’ll need something to connect to your Pi from, whether it’s a laptop, desktop, or even your phone.
That’s it! No extra gadgets, no complicated setups. Just your trusty Raspberry Pi and a solid internet connection. Let’s move on to the next step.
Step-by-Step Guide to Remote Control Raspberry Pi
Now that you know what you need, let’s dive into the process. Here’s a step-by-step guide to help you remotely control your Raspberry Pi over the internet:
1. Update Your Raspberry Pi OS
First things first, make sure your Raspberry Pi is running the latest version of the OS. This ensures that everything works smoothly and reduces the risk of compatibility issues.
Read also:Ruby Franke Kids Wounds A Deep Dive Into Healing And Empowerment
Open the terminal on your Pi and run the following commands:
sudo apt update
sudo apt upgrade
These commands will update your package list and upgrade any outdated software. Easy peasy, right?
2. Enable SSH on Your Raspberry Pi
SSH (Secure Shell) is the backbone of remote access. It allows you to securely connect to your Pi from another device. To enable SSH, follow these steps:
- Open the Raspberry Pi Configuration tool by typing
sudo raspi-configin the terminal. - Navigate to Interfacing Options and select SSH.
- Choose Yes to enable SSH and then hit OK.
- Exit the configuration tool and reboot your Pi with
sudo reboot.
Boom! SSH is now ready to roll.
3. Find Your Pi’s IP Address
To connect to your Pi remotely, you’ll need its IP address. You can find this by typing the following command in the terminal:
hostname -I
This will display your Pi’s local IP address. Write it down or memorize it—it’s your key to accessing your Pi.
4. Set Up Port Forwarding on Your Router
Here’s where things get a little tricky but trust me, it’s worth it. Port forwarding allows external devices to connect to your Pi through your router. Here’s how to do it:
- Log in to your router’s admin panel. The exact method varies depending on your router, but you can usually access it by typing
192.168.0.1or192.168.1.1in your browser. - Find the Port Forwarding section. It might be under Advanced Settings or NAT.
- Add a new rule and set the external and internal ports to 22 (the default SSH port).
- Set the internal IP address to your Pi’s local IP address.
- Save the changes and reboot your router if necessary.
And just like that, your router is ready to forward traffic to your Pi.
Using SSH Clients to Connect
Now that your Pi is all set up, it’s time to connect to it remotely. There are several SSH clients you can use, depending on your device:
1. PuTTY for Windows
PuTTY is one of the most popular SSH clients for Windows. Here’s how to use it:
- Download and install PuTTY from the official website.
- Open PuTTY and enter your Pi’s public IP address in the Host Name field.
- Set the port to 22 and choose SSH as the connection type.
- Click Open and log in using your Pi’s username and password.
Voilà! You’re now connected to your Pi.
2. Terminal for macOS and Linux
If you’re using a Mac or Linux machine, you already have a built-in SSH client. Simply open the terminal and type:
ssh username@public_ip_address
Replace username with your Pi’s username and public_ip_address with your Pi’s public IP. Enter your password when prompted, and you’re good to go.
3. Mobile Apps for On-the-Go Access
For those times when you’re away from your computer, there are plenty of SSH apps available for smartphones. Some popular ones include:
- Serverauditor (iOS)
- JuiceSSH (Android)
These apps work similarly to desktop clients, allowing you to connect to your Pi with ease.
Securing Your Remote Connection
Security is always a top priority when dealing with remote access. Here are a few tips to keep your Pi safe:
- Change the Default SSH Port: Instead of using port 22, change it to something less obvious to deter attackers.
- Use Strong Passwords: Avoid using simple or common passwords. Consider using a password manager to generate and store complex ones.
- Enable Two-Factor Authentication: Add an extra layer of security by requiring a second form of verification.
- Regularly Update Your Pi: Keep your OS and software up to date to patch any vulnerabilities.
By following these steps, you’ll ensure that your remote connection remains secure and protected from potential threats.
Troubleshooting Common Issues
Even with the best-laid plans, things can go wrong. Here are some common issues you might encounter and how to fix them:
1. Unable to Connect via SSH
If you’re unable to connect to your Pi via SSH, check the following:
- Make sure SSH is enabled on your Pi.
- Verify that your router’s port forwarding is correctly configured.
- Double-check your IP address and ensure it hasn’t changed.
2. Connection Timeout
A connection timeout usually indicates a network issue. Try the following:
- Restart your router and modem.
- Ensure your Pi is connected to the internet.
- Check your firewall settings to ensure they’re not blocking the connection.
3. Wrong Password
Forgot your password? Don’t worry, it happens to the best of us. Here’s how to reset it:
- Connect a keyboard and monitor to your Pi.
- Boot it up and log in locally.
- Run the command
sudo passwdto change the password.
Problem solved!
Advanced Tips for Power Users
For those of you who want to take things to the next level, here are some advanced tips:
1. Use a Static IP Address
Assigning a static IP address to your Pi ensures that it doesn’t change, making remote access more reliable. To do this:
- Open the terminal and edit the
/etc/dhcpcd.conffile withsudo nano /etc/dhcpcd.conf. - Add the following lines, replacing the placeholders with your router’s gateway and subnet mask:
interface eth0static ip_address=your_static_ipstatic routers=your_router_ipstatic domain_name_servers=your_dns_server
- Save and exit the file, then reboot your Pi.
2. Set Up a Dynamic DNS Service
If your ISP assigns a dynamic IP address, consider using a Dynamic DNS (DDNS) service. This allows you to access your Pi using a domain name instead of an IP address. Some popular DDNS services include:
- No-IP
- Dynu
Follow their instructions to set up the service on your router or Pi.
Conclusion
And there you have it, folks! A comprehensive guide on how to use remote control Raspberry Pi over the internet without any extra gadgets. Whether you’re a beginner or an experienced user, this guide should have everything you need to get started.
Remember, the key to successful remote access is preparation and security. Take the time to set things up properly, and you’ll be rewarded with a powerful tool that can help you achieve your tech goals.
So, what are you waiting for? Go ahead and try it out for yourself. And don’t forget to share your experiences in the comments below or check out our other articles for more tech tips and tricks. Happy hacking!
Table of Contents
Article Recommendations