How To Deactivate Your FB Account: The Ultimate Guide For 2023
Let’s face it, folks—Facebook has been part of our lives for years, but sometimes, you just need a break. Whether it’s because of privacy concerns, mental health, or simply wanting to unplug, learning how to deactivate your FB account is a skill everyone should know. In this article, we’ll walk you through the process step by step, so you don’t get lost in the maze of settings and pop-ups.
Now, I get it—Facebook can feel like a second home for some people. It’s where we keep in touch with friends, join groups, and even run businesses. But hey, life happens, and sometimes, you just need to step away. Deactivating your account isn’t the same as deleting it permanently, but it gives you that much-needed break without burning bridges.
This guide isn’t just about clicking buttons; it’s about empowering you to take control of your digital life. We’ll cover everything from why you might want to deactivate your account to the nitty-gritty details of the process. So, grab your coffee, sit back, and let’s dive in!
Read also:Colorado Revenue Online Unlocking The Digital Cash Flow
Why Deactivate Your FB Account?
Before we jump into the how, let’s talk about the why. Understanding your reasons for deactivating your account can help you stay focused and make the process smoother. Here are a few common reasons people choose to deactivate:
- Privacy Concerns: Let’s be real—data breaches and privacy issues are real concerns these days. Deactivating your account can give you peace of mind while you reassess your online presence.
- Mental Health: Social media can be overwhelming, and taking a break can do wonders for your mental well-being. Deactivation allows you to step away without permanently losing your connections.
- Time Management: If Facebook is eating up too much of your day, deactivation can help you regain control of your time and focus on what really matters.
- Relationship Issues: Whether it’s a breakup or a family feud, sometimes it’s best to step away from the drama for a while.
Whatever your reason, deactivating your FB account is a simple way to take a breather without burning bridges. Now, let’s get into the details!
Step-by-Step Guide: How to Deactivate FB Account
Deactivating your FB account is easier than you think, but it’s not exactly intuitive. Facebook doesn’t exactly make it easy for you to leave, so we’re here to guide you through the process. Follow these steps carefully:
Step 1: Log In to Your Account
First things first, you’ll need to log in to your FB account. If you’re not already logged in, head over to Facebook.com and enter your credentials. Don’t worry if you’ve forgotten your password—there’s a recovery option for that.
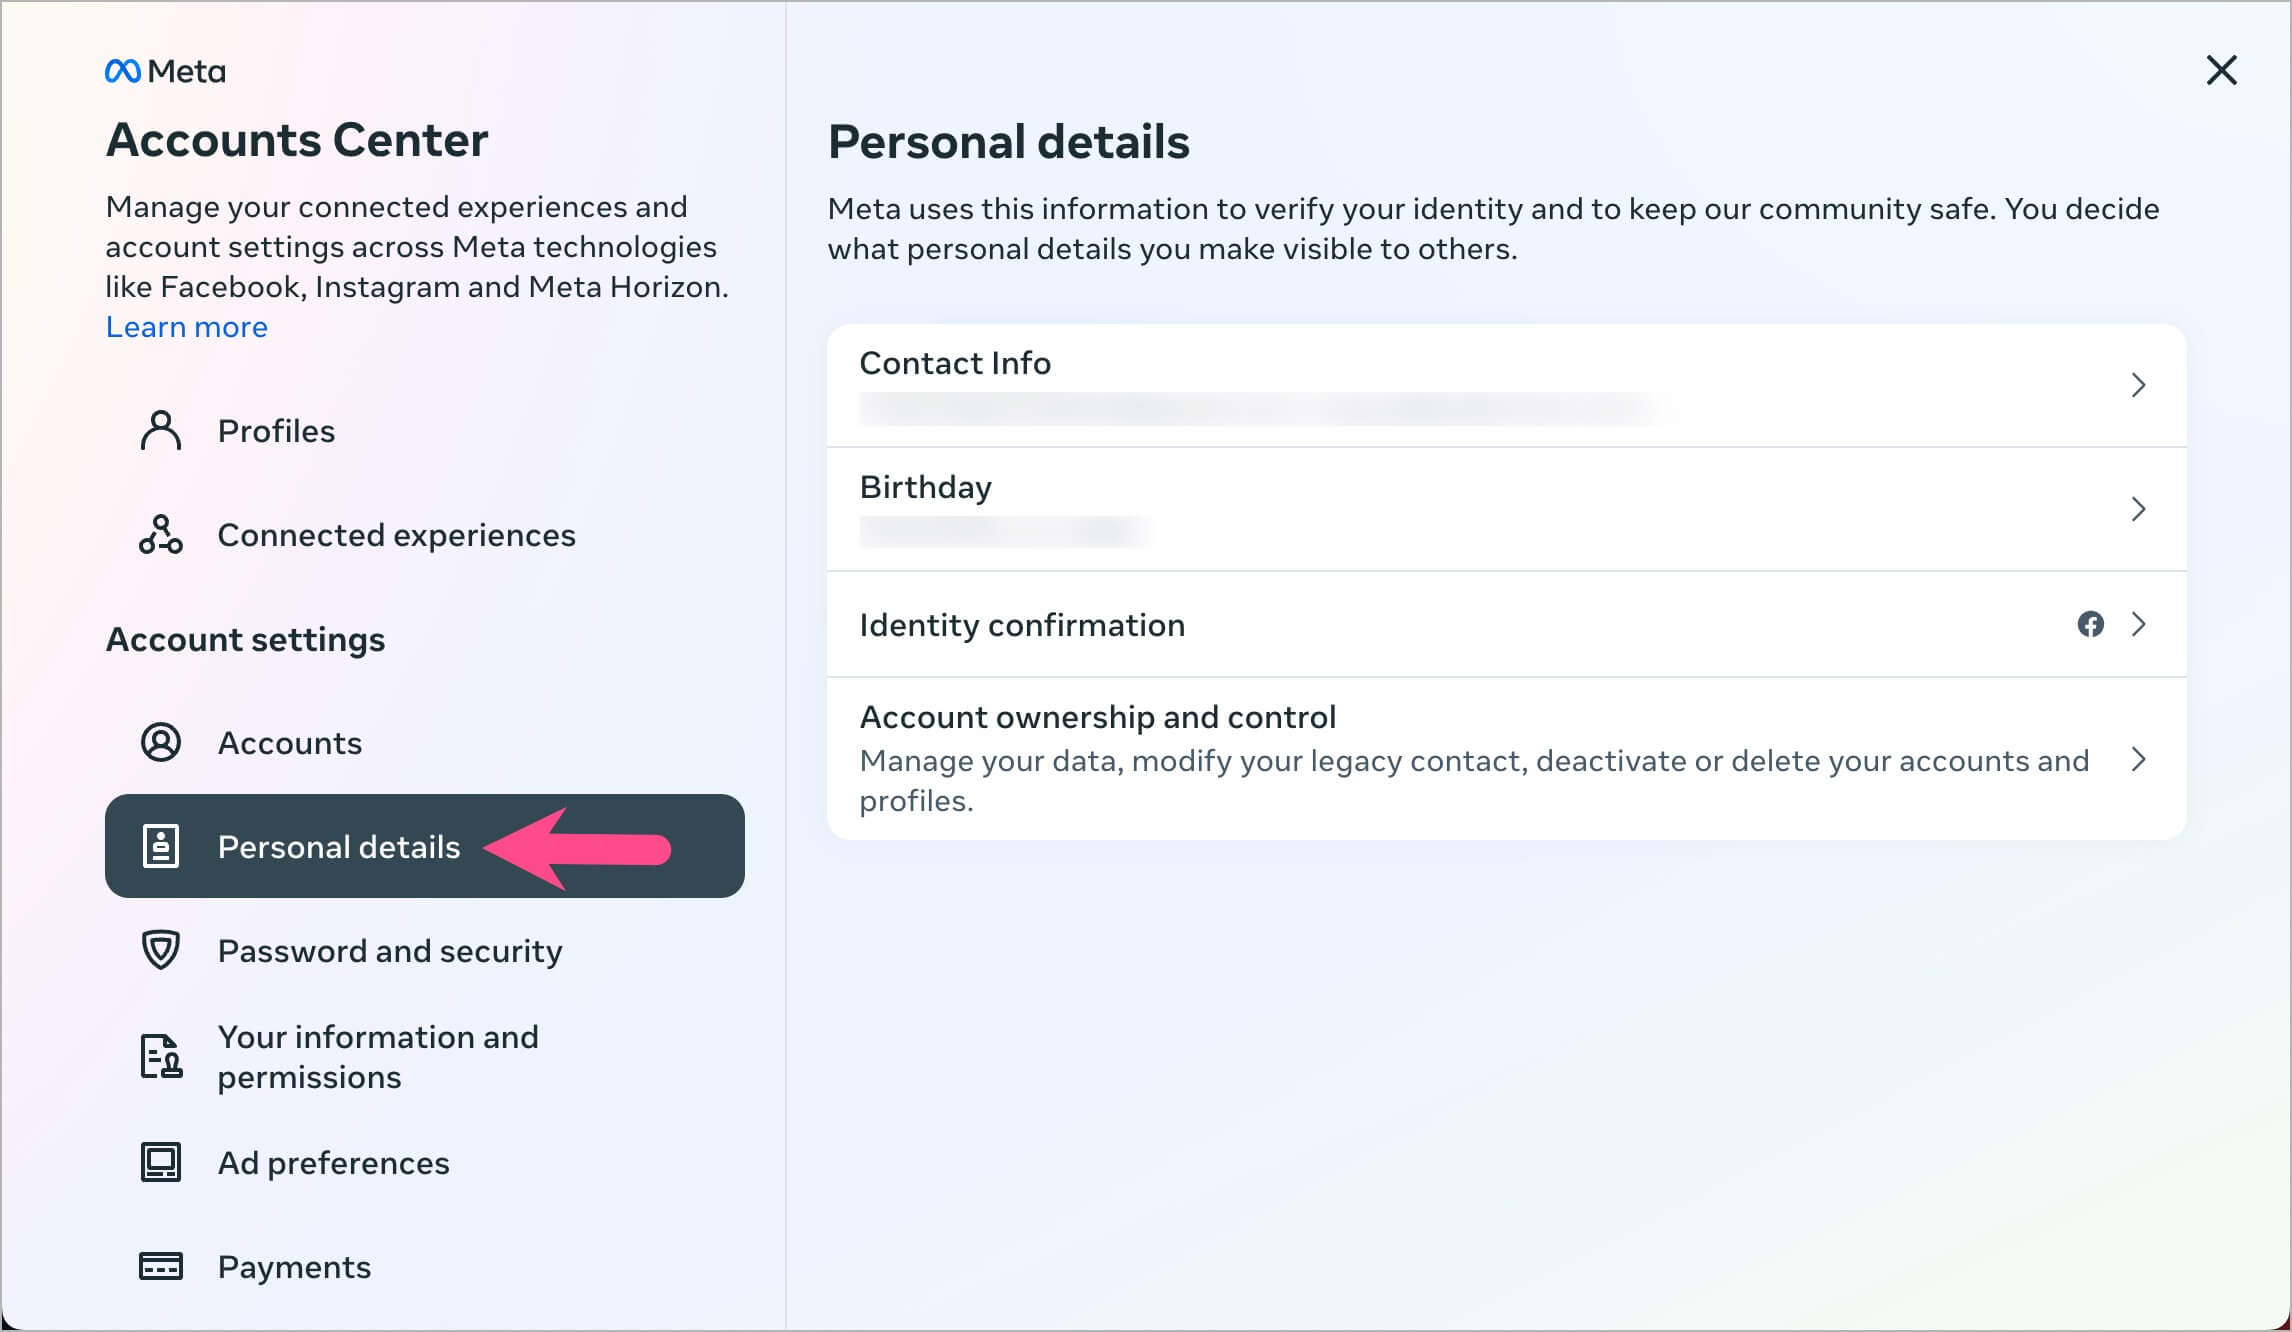
Step 2: Navigate to Settings & Privacy
Once you’re logged in, click on the dropdown arrow in the top-right corner of the screen. From there, select “Settings & Privacy.” This is where all the magic happens.
Step 3: Find the Deactivation Option
In the Settings & Privacy menu, click on “Settings.” Then, scroll down to the bottom of the page and click on “Your Facebook Information.” From there, look for the “Deactivate Your Account” option. It might be a bit hidden, but it’s there!
Read also:Crazy Days And Nights A Wild Journey Through Lifes Chaotic Adventures
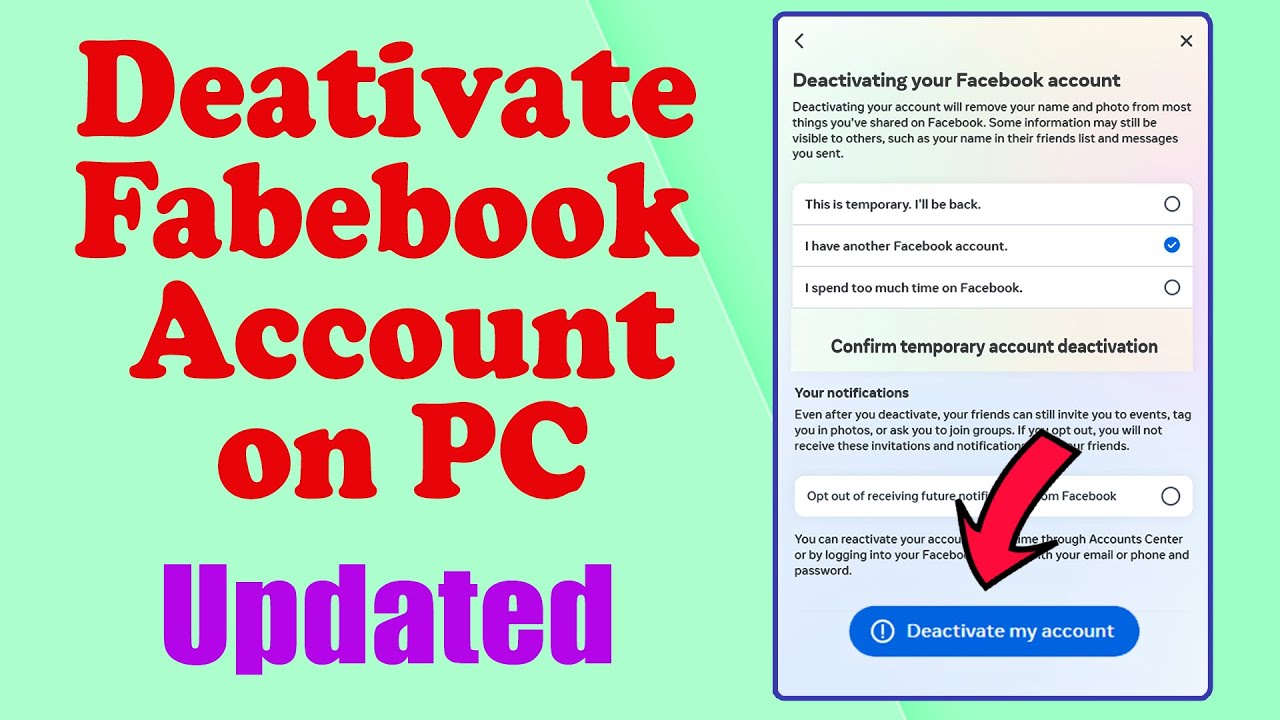
Step 4: Confirm Your Decision
When you click on “Deactivate Your Account,” Facebook will ask you why you’re leaving. You don’t have to answer this question, but it’s a good opportunity to reflect on your reasons. Once you’re ready, click “Continue” to confirm your decision.
Step 5: Say Goodbye
That’s it! Your account is now deactivated. You’ll be logged out automatically, and your profile will no longer be visible to others. But don’t worry—you can always reactivate it later if you change your mind.
What Happens When You Deactivate Your FB Account?
Deactivating your FB account doesn’t mean it’s gone forever. Here’s what happens when you deactivate:
- Your profile becomes invisible to others.
- Your friends won’t see you in their friend lists or in search results.
- Your posts, photos, and other content remain on the platform but are hidden from view.
- You can reactivate your account anytime by logging back in with your credentials.
Deactivation is a temporary solution that gives you the flexibility to return when you’re ready. It’s perfect for those who want a break without permanently losing their account.
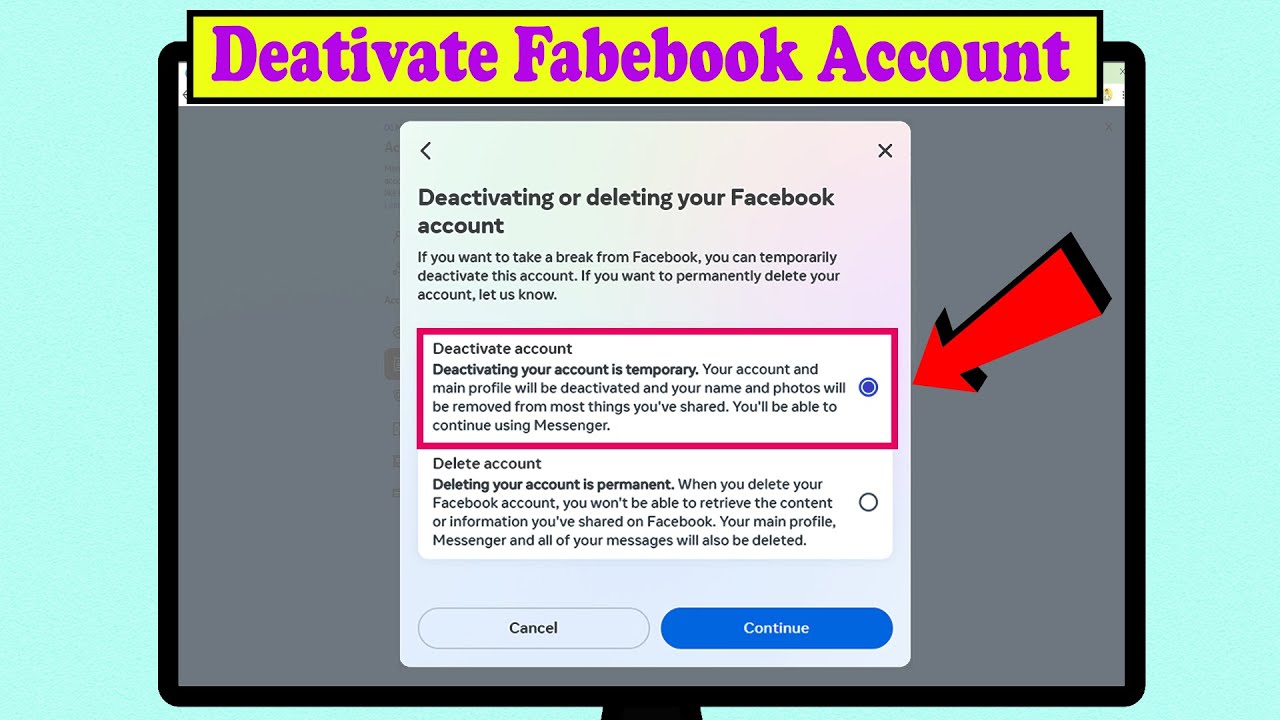
Deactivation vs. Deletion: What’s the Difference?
Let’s clear up a common misconception: deactivation and deletion are not the same thing. Here’s a quick breakdown of the differences:
- Deactivation: Your account is hidden from view, but your data remains on Facebook’s servers. You can reactivate it anytime.
- Deletion: Your account and all associated data are permanently removed from Facebook. This process takes about 30 days to complete.
If you’re unsure about whether to deactivate or delete your account, ask yourself this: Do I want to keep my connections and content intact for future use? If the answer is yes, deactivation is the way to go.
Common Questions About Deactivating FB Account
Here are some frequently asked questions about deactivating your FB account:
Can I Reactivate My Account After Deactivation?
Absolutely! Reactivating your account is as simple as logging back in with your email and password. All your data, including posts, photos, and friends, will be restored.
Will My Friends Know I Deactivated My Account?
Nope! Your friends won’t receive any notification when you deactivate your account. They’ll simply notice that you’re no longer visible in their friend lists or search results.
What Happens to My Groups and Pages?
Your groups and pages will remain active, but you won’t be able to manage them while your account is deactivated. If you’re the admin of a group or page, consider assigning a co-admin to keep things running smoothly.
Tips for a Smooth Deactivation Process
Here are a few tips to make the deactivation process as smooth as possible:
- Download Your Data: Before deactivating, consider downloading a copy of your FB data. This includes your photos, posts, and other content. You can do this through the “Your Facebook Information” section.
- Unsubscribe from Notifications: If you don’t want to be reminded of Facebook while your account is deactivated, unsubscribe from email and SMS notifications.
- Plan Your Return: If you think you might reactivate your account in the future, take some time to plan how you’ll use Facebook when you come back.
These tips can help you make the most of your break from Facebook while ensuring a seamless return if you decide to come back.
Alternatives to Deactivating Your FB Account
If deactivating your FB account feels too drastic, there are other options you can consider:
1. Take a Break from Facebook
You don’t have to deactivate your account to take a break. Simply limit your time on the platform by setting boundaries or using apps that track your screen time.
2. Use Facebook Less Frequently
Instead of deactivating, try reducing the frequency of your Facebook use. This can help you maintain your connections while minimizing the impact on your mental health.
3. Explore Other Social Media Platforms
There are plenty of alternatives to Facebook, such as Instagram, Twitter, and LinkedIn. Experiment with these platforms to see if they better suit your needs.
How to Delete Your FB Account Permanently
If you’ve decided that deactivation isn’t enough and you want to delete your FB account permanently, here’s how to do it:
Step 1: Log In to Your Account
Just like with deactivation, you’ll need to log in to your FB account to start the deletion process.
Step 2: Go to the Delete Account Page
Head over to the “Settings & Privacy” menu and click on “Settings.” Then, scroll down to the “Your Facebook Information” section and click on “Manage Your Account.” From there, select “Delete Account.”
Step 3: Confirm Your Decision
Facebook will ask you to confirm your decision before proceeding. Once you’ve confirmed, your account will be queued for deletion. This process takes about 30 days to complete.
Final Thoughts: Is Deactivating FB Worth It?
Deactivating your FB account is a personal decision that depends on your needs and circumstances. Whether you’re looking to take a break, improve your mental health, or simply reassess your online presence, deactivation offers a flexible solution that allows you to return when you’re ready.
Remember, taking control of your digital life is all about balance. Use this guide to make an informed decision and take the steps that work best for you.
So, what are you waiting for? Take that first step toward a healthier, more balanced digital life. And don’t forget to share this article with your friends who might be considering deactivation too!
Table of Contents
- Why Deactivate Your FB Account?
- Step-by-Step Guide: How to Deactivate FB Account
- What Happens When You Deactivate Your FB Account?
- Deactivation vs. Deletion: What’s the Difference?
- Common Questions About Deactivating FB Account
- Tips for a Smooth Deactivation Process
- Alternatives to Deactivating Your FB Account
- How to Delete Your FB Account Permanently
- Final Thoughts: Is Deactivating FB Worth It?
Article Recommendations