Shower Cartridge Replacement: A Beginner's Guide To Fixing Your Shower Like A Pro
Have you ever stepped into the shower expecting a relaxing warm spray only to get blasted with freezing water? Yeah, we’ve all been there. If your shower is acting up, chances are it’s time for a shower cartridge replacement. Don’t panic! Replacing a shower cartridge isn’t as scary as it sounds, and with the right steps, you can fix it yourself without calling a plumber.
Shower cartridge replacement is one of those tasks that might seem intimidating at first, but once you break it down, it’s surprisingly doable. Whether you’re dealing with inconsistent water temperature, low water pressure, or just a plain leaky faucet, replacing the cartridge can often solve the problem.
But here’s the thing—there’s a lot of misinformation out there about how to replace a shower cartridge. That’s why we’ve created this comprehensive guide to walk you through every step of the process. By the end of this article, you’ll know exactly what tools you need, how to identify the right cartridge for your shower, and how to install it like a pro. Let’s dive in!
Read also:Kagney Lynn Carter The Rising Star In The Adult Entertainment Industry
Table of Contents
- What is a Shower Cartridge?
- Signs You Need a Shower Cartridge Replacement
- Tools You’ll Need
Choosing the Right Shower Cartridge
- Step-by-Step Guide to Replacing a Shower Cartridge
- Common Mistakes to Avoid
- Cost Considerations for Shower Cartridge Replacement
- Professional vs. DIY: Which Should You Choose?
- Maintenance Tips to Extend the Life of Your Shower Cartridge
- Final Thoughts
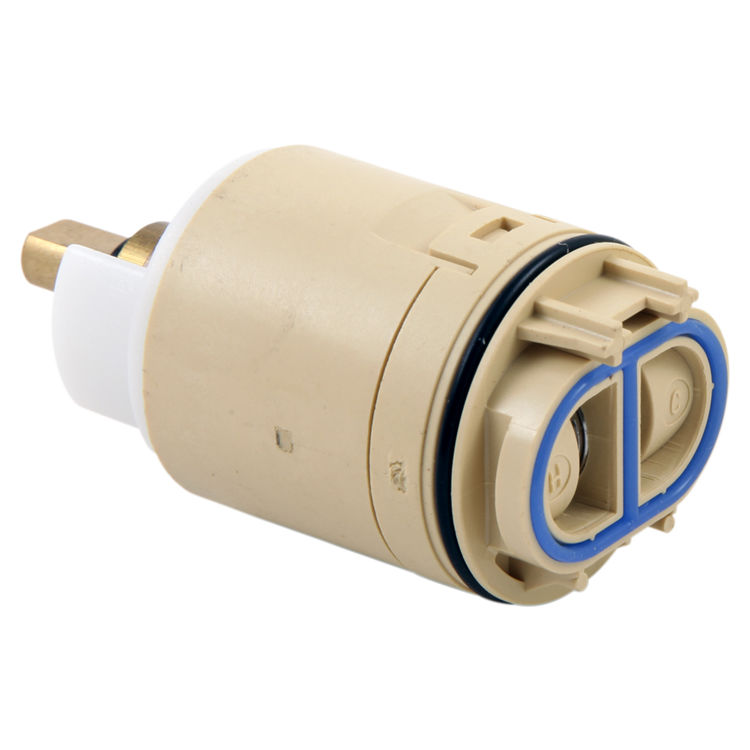
What is a Shower Cartridge?
Let’s start with the basics. A shower cartridge is essentially the heart of your shower faucet. It controls the flow and temperature of the water coming out of your showerhead. Think of it like the brain of your shower system—it’s what makes sure you get the perfect balance of hot and cold water.
Over time, shower cartridges can wear out due to mineral buildup, corrosion, or just plain old age. When this happens, you might notice issues like fluctuating water temperatures, reduced water pressure, or even leaks. Replacing the cartridge is usually the best way to fix these problems.
Signs You Need a Shower Cartridge Replacement
Before you go grabbing your tools, it’s important to know when a shower cartridge replacement is necessary. Here are some common signs that your shower cartridge might be on its last legs:
- Fluctuating Water Temperature: If your shower keeps alternating between scalding hot and ice-cold, it’s probably time for a new cartridge.
- Low Water Pressure: Mineral deposits can clog up the cartridge, leading to reduced water flow.
- Leaking Faucet: A dripping faucet is often a sign that the cartridge is worn out or damaged.
- Strange Noises: If you hear unusual sounds like squeaking or grinding when you turn the faucet, it could be the cartridge causing the problem.
These signs don’t always mean you need a new cartridge, but they’re definitely worth investigating. Sometimes, a simple cleaning can do the trick, but if the issues persist, replacement is usually the best solution.
Tools You’ll Need
Now that you’ve decided to replace your shower cartridge, let’s talk about the tools you’ll need to get the job done. Here’s a quick list:
- Cartridge Puller: This is a specialized tool designed to remove old cartridges. You can usually find one at your local hardware store.
- Socket Wrench: For removing the shower handle and other parts.
- Plumber’s Tape: Also known as Teflon tape, this helps create a watertight seal.
- Replacement Cartridge: Make sure you have the right one for your specific faucet model.
- Gloves: To protect your hands from sharp edges and mineral deposits.
Having the right tools makes the job much easier and ensures a successful replacement. Don’t skimp on quality here—it’s worth investing in good tools if you plan on doing more DIY plumbing projects in the future.
Read also:New India Bazar A Vibrant Hub Of Culture Commerce And Community
Choosing the Right Shower Cartridge
Picking the right shower cartridge is crucial for a successful replacement. Not all cartridges are created equal, so you’ll need to do a bit of research to find the one that fits your faucet. Here’s how:
- Check Your Faucet Brand: Different brands use different types of cartridges. Common brands include Delta, Moen, and Kohler, among others.
- Look for Model Numbers: Most faucets have a model number stamped somewhere on the handle or inside the valve. This number can help you find the exact cartridge you need.
- Consult the Manufacturer’s Website: Many manufacturers offer detailed guides on how to identify and purchase the correct cartridge for your faucet.
It’s also a good idea to bring your old cartridge with you to the store when buying a new one. This way, you can compare sizes and ensure a perfect match.
Step-by-Step Guide to Replacing a Shower Cartridge
Now that you have everything you need, let’s walk through the process of replacing a shower cartridge. Follow these steps carefully to ensure a smooth and successful replacement:
- Turn Off the Water Supply: This is the most important step. Locate the shut-off valve under your sink or near the water heater and turn it off to prevent water from flowing while you work.
- Remove the Shower Handle: Use a socket wrench to unscrew the handle and gently pull it off. Be careful not to damage the finish.
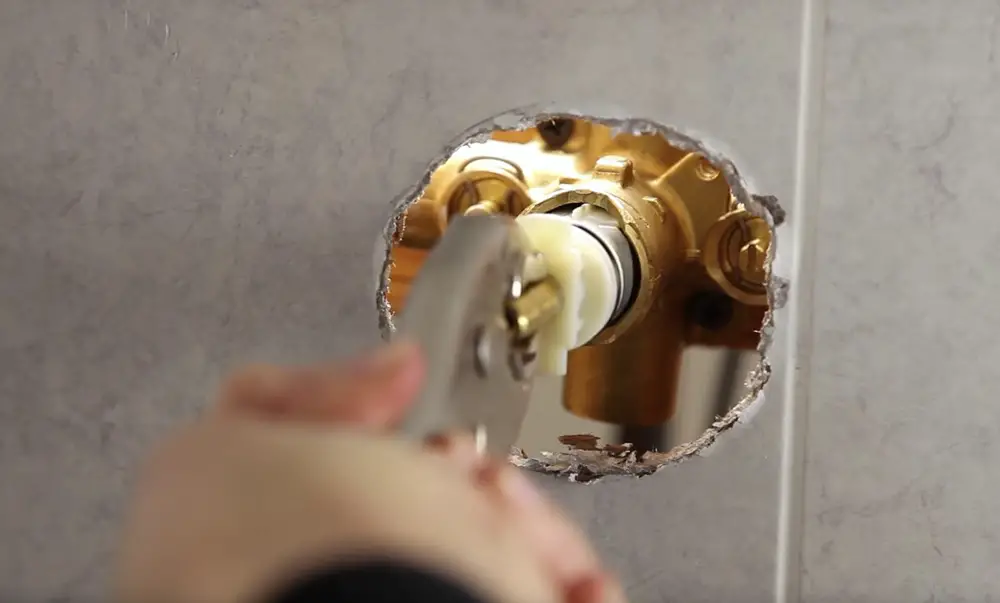
- Take Out the Cartridge: Use a cartridge puller to carefully remove the old cartridge. You might need to wiggle it a bit to get it loose.
- Clean the Valve: Use a soft cloth or brush to clean out any mineral deposits or debris inside the valve.
- Install the New Cartridge: Slide the new cartridge into place, making sure it’s properly aligned. Tighten it gently with the puller.
- Reassemble the Faucet: Put the handle back on and tighten it securely. Don’t forget to wrap plumber’s tape around any threads to ensure a watertight seal.
- Test the Shower: Turn the water supply back on and test the shower to make sure everything is working properly.
And that’s it! With these simple steps, you’ve successfully replaced your shower cartridge. Congrats—you just saved yourself a plumber’s bill!
Common Mistakes to Avoid
Even the most experienced DIYers can make mistakes when replacing a shower cartridge. Here are a few common ones to watch out for:
- Using the Wrong Cartridge: Make sure you have the right cartridge for your faucet model. Using the wrong one can lead to leaks or improper function.
- Over-Tightening: Don’t over-tighten the cartridge or handle. This can cause damage and make future replacements more difficult.
- Skipping the Water Shut-Off: Always turn off the water supply before starting. Trust us, you don’t want to deal with a flood in the middle of the job.
Avoiding these mistakes will save you time, money, and frustration. Take your time and double-check each step to ensure a flawless replacement.
Cost Considerations for Shower Cartridge Replacement
One of the biggest advantages of replacing a shower cartridge yourself is the cost savings. On average, a new cartridge costs between $10 and $50, depending on the brand and model. Add in the cost of tools and materials, and you’re still looking at a fraction of what a plumber would charge.
Of course, if you’re not comfortable doing the job yourself, hiring a professional is always an option. Just be prepared to pay anywhere from $100 to $300 for labor and materials.
Professional vs. DIY: Which Should You Choose?
Deciding whether to tackle a shower cartridge replacement yourself or hire a professional depends on your comfort level with DIY projects. If you’re handy with tools and willing to put in the time to learn, DIY is a great option. However, if you’re short on time or unsure about your skills, it might be worth hiring a plumber to ensure the job is done right.
Consider factors like the complexity of your faucet, the availability of replacement parts, and your own experience level when making your decision.
Maintenance Tips to Extend the Life of Your Shower Cartridge
Replacing a shower cartridge doesn’t have to be a frequent occurrence. With proper maintenance, you can extend the life of your cartridge and avoid future issues. Here are a few tips:
- Regular Cleaning: Clean your showerhead and faucet regularly to prevent mineral buildup.
- Use Water Softeners: If you live in an area with hard water, consider installing a water softener to reduce mineral deposits.
- Check for Leaks: Periodically inspect your faucet for leaks and address them promptly to prevent damage to the cartridge.
By following these simple tips, you can keep your shower running smoothly for years to come.
Final Thoughts
Shower cartridge replacement might sound intimidating, but with the right tools and knowledge, it’s a task you can tackle yourself. Whether you’re dealing with fluctuating water temperatures, low pressure, or leaks, replacing the cartridge can often solve the problem.
Remember to take your time, follow the steps carefully, and don’t hesitate to reach out for help if you need it. And most importantly, don’t forget to test your shower afterward to make sure everything is working as it should.
So, what are you waiting for? Grab your tools and get to work. Once you’re done, you’ll have a perfectly functioning shower and the satisfaction of knowing you did it yourself. Happy fixing!
Article Recommendations