Raspberry Pi Remote Login Free: The Ultimate Guide To Secure And Hassle-Free Access
So, you've got this tiny Raspberry Pi sitting somewhere, and you're wondering how to access it remotely without breaking the bank? Well, buckle up because we're about to dive deep into the world of Raspberry Pi remote login free solutions. Whether you're a tech enthusiast or just someone looking to expand your home automation setup, this guide has got you covered. From setting up SSH to exploring alternative methods, we'll make sure you're up and running in no time.
Now, let's be real here—Raspberry Pi is more than just a hobbyist's toy. It's a powerhouse that can handle everything from media streaming to home security systems. But what happens when you're not physically near your Pi? That's where remote login comes in. With the right tools and setup, you can control your Raspberry Pi from anywhere in the world, all for free. Sounds cool, right?
Before we jump into the nitty-gritty, let's clarify something. Free doesn't mean insecure or complicated. In fact, with a bit of tinkering and some open-source magic, you can achieve a remote login system that's both robust and reliable. So, whether you're a beginner or an experienced user, this guide will walk you through every step of the process. Let's get started!
Read also:Spotting Vs Period What You Need To Know About The Differences
Why Raspberry Pi Remote Login Free is a Game-Changer
Let's face it—Raspberry Pi is more than just a little board with some GPIO pins. It's a versatile tool that can do wonders, but only if you know how to harness its power. Remote login is one of those features that elevates your Pi from a local device to a global powerhouse. Imagine being able to check on your home security system while you're on vacation or controlling your media server from your office. That's the kind of flexibility we're talking about.
Benefits of Remote Access
Here's a quick rundown of why remote login is such a big deal:
- Convenience: Access your Pi from anywhere without needing physical access.
- Cost-Effective: Most remote login solutions are free or come at a minimal cost.
- Security: With the right setup, you can ensure your Pi remains safe from unauthorized access.
- Flexibility: Whether you're monitoring a weather station or running a web server, remote login gives you the freedom to manage everything from afar.
Understanding SSH: The Backbone of Raspberry Pi Remote Login Free
When it comes to remote login, SSH (Secure Shell) is the king. It's like the Swiss Army knife of remote access tools, providing secure communication between your computer and your Raspberry Pi. The best part? It's free and already built into most Linux distributions, including Raspbian.
Setting Up SSH on Your Raspberry Pi
Here's a step-by-step guide to getting SSH up and running:
- Boot up your Raspberry Pi and connect it to your local network.
- Open the terminal and type
sudo raspi-config. - Navigate to "Interfacing Options" and enable SSH.
- Reboot your Pi to apply the changes.
Once SSH is enabled, you can use tools like PuTTY (for Windows) or the built-in terminal on macOS and Linux to connect to your Pi. Just type ssh pi@your-pi-ip-address, and you're good to go.
Alternative Methods for Raspberry Pi Remote Login Free
While SSH is the go-to method for most users, there are other ways to achieve remote login. Depending on your needs, these alternatives might be a better fit.
Read also:Tim Matheson Net Worth 2024 The Untold Story Of Success And Fame
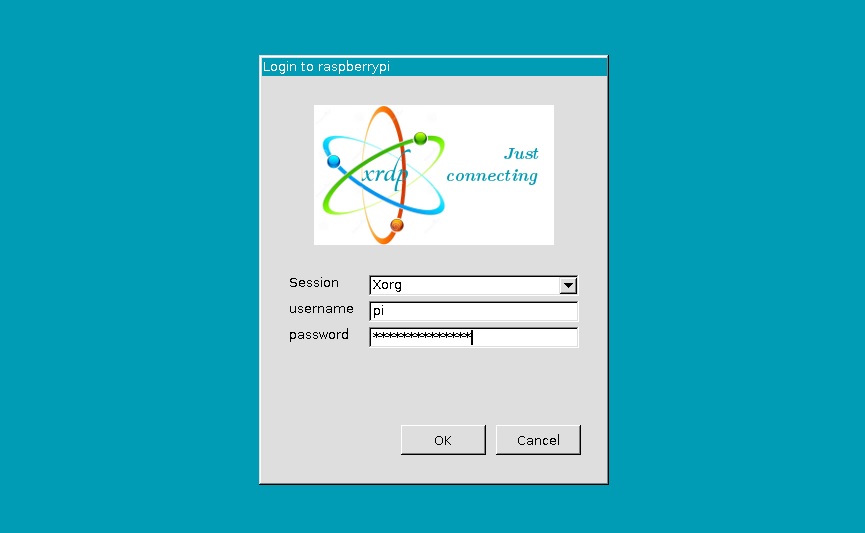
VNC: The Visual Approach
VNC (Virtual Network Computing) allows you to remotely control your Raspberry Pi's graphical interface. This is perfect if you need more than just a command-line interface. To set up VNC:
- Install the VNC Server on your Pi using
sudo apt install realvnc-vnc-server realvnc-vnc-viewer. - Enable VNC through
sudo raspi-config. - Use a VNC client on your computer to connect to your Pi.
VNC is great for beginners who might find the command line intimidating, but it does require a bit more bandwidth than SSH.
Securing Your Raspberry Pi Remote Login Free Setup
With great power comes great responsibility. While remote login is incredibly useful, it also opens up potential security risks. Here are some tips to keep your Pi safe:
- Change the Default Password: Never leave the default "raspberry" password unchanged.
- Use Strong Passwords: Consider using a password manager to generate complex passwords.
- Enable Two-Factor Authentication: Tools like Google Authenticator can add an extra layer of security.
- Regularly Update Your Pi: Keep your software up to date to protect against vulnerabilities.
Setting Up a Static IP Address
One common issue with remote login is that your Pi's IP address might change, especially if you're using DHCP. To avoid this, you can set up a static IP address. Here's how:
- Open the terminal and type
sudo nano /etc/dhcpcd.conf. - Add the following lines at the end of the file:
interface eth0
static ip_address=192.168.1.100/24
static routers=192.168.1.1
static domain_name_servers=192.168.1.1
Replace the IP addresses with those relevant to your network.
Using Port Forwarding for External Access
So, you've got SSH working on your local network, but what if you want to access your Pi from outside your home? That's where port forwarding comes in. Here's how to set it up:
- Log in to your router's admin interface.
- Find the port forwarding section and create a new rule.
- Forward port 22 (the default SSH port) to your Raspberry Pi's local IP address.
Now, you can connect to your Pi using its public IP address. Just remember to use a dynamic DNS service if your IP address changes frequently.
Troubleshooting Common Issues
Even the best-laid plans can go awry. Here are some common issues you might encounter and how to fix them:
- Connection Refused: Check that SSH is enabled and your IP address is correct.
- Authentication Failed: Double-check your username and password.
- Timeout Errors: Ensure your Pi is connected to the network and there are no firewall blocks.
Exploring Advanced Features
Once you've got the basics down, it's time to explore some advanced features that can take your Raspberry Pi remote login setup to the next level.
SSH Tunnels
SSH tunnels allow you to securely access other services running on your Pi, such as a web server or database. Here's how to set one up:
ssh -L 8080:localhost:80 pi@your-pi-ip-address
Now, you can access your Pi's web server by navigating to http://localhost:8080 on your computer.
Conclusion
And there you have it—the ultimate guide to Raspberry Pi remote login free solutions. Whether you're using SSH, VNC, or some other method, the key is to set up a secure and reliable system that meets your needs. Remember, security should always be a top priority, so take the time to implement best practices and keep your Pi safe.
Now, it's your turn. Have you tried any of these methods? Do you have any tips or tricks to share? Leave a comment below and let us know. And if you found this guide helpful, don't forget to share it with your friends and fellow Pi enthusiasts. Until next time, happy tinkering!
Table of Contents
- Why Raspberry Pi Remote Login Free is a Game-Changer
- Understanding SSH: The Backbone of Raspberry Pi Remote Login Free
- Alternative Methods for Raspberry Pi Remote Login Free
- Securing Your Raspberry Pi Remote Login Free Setup
- Setting Up a Static IP Address
- Using Port Forwarding for External Access
- Troubleshooting Common Issues
- Exploring Advanced Features
- Conclusion
Article Recommendations